Windows 10 is a pretty powerful operating system and you can get more from it with a few adjustments to suit your work and preferences.
These adjustments accumulate over time and if something or someone was to undo them at once, you would have a hard time remembering each and every one of them.
And even if you did remember everything, it would be arduous to go through the entire system to make the adjustments.
Unfortunately, scenarios necessitating system restoration are all too common. It could be a virus attack, or a recent program causing your computer to misbehave.
Whatever the case, a clean install would be an option. However, this means you will lose vital files and programs.
This is where the system restore feature comes in handy. Restoring your operating system means it will be reset to an earlier date.
Programs and changes made after the restore point date will be lost; which is the intention here. Files and folders will be however spared.
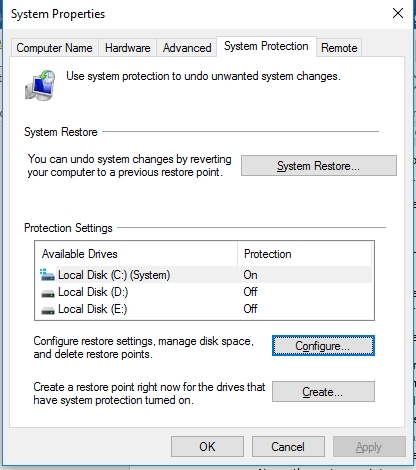
How to create a system restore point on a Windows 10 computer

- Type restore point in the search box.
- Click on Create a restore point from the results.
- Choose the system disk (it will be labelled system) and click on Configure.
- Choose to the Turn on the system protection
- Move the slider to set the maximum disk space usage allowed for system restore.
- Click Create to create an initial restore point.
- Name the restore point as appropriate in the next prompt.
- Click Close and you are set.
[irp]
To restore your system, click on the System Restore option under the System Protection tab. You may need to hold down Shift and click on Restart to get into the troubleshooting menu.
Leave a Reply